AUTHENTIC THAI RECIPES

Scroll down or use the search bars to explore my recipes, select a meal, and follow my easy cooking instructions to enjoy the authentic flavors of Thailand in your kitchen.

Curry and Paste Amy Raaf Curry and Paste Amy Raaf

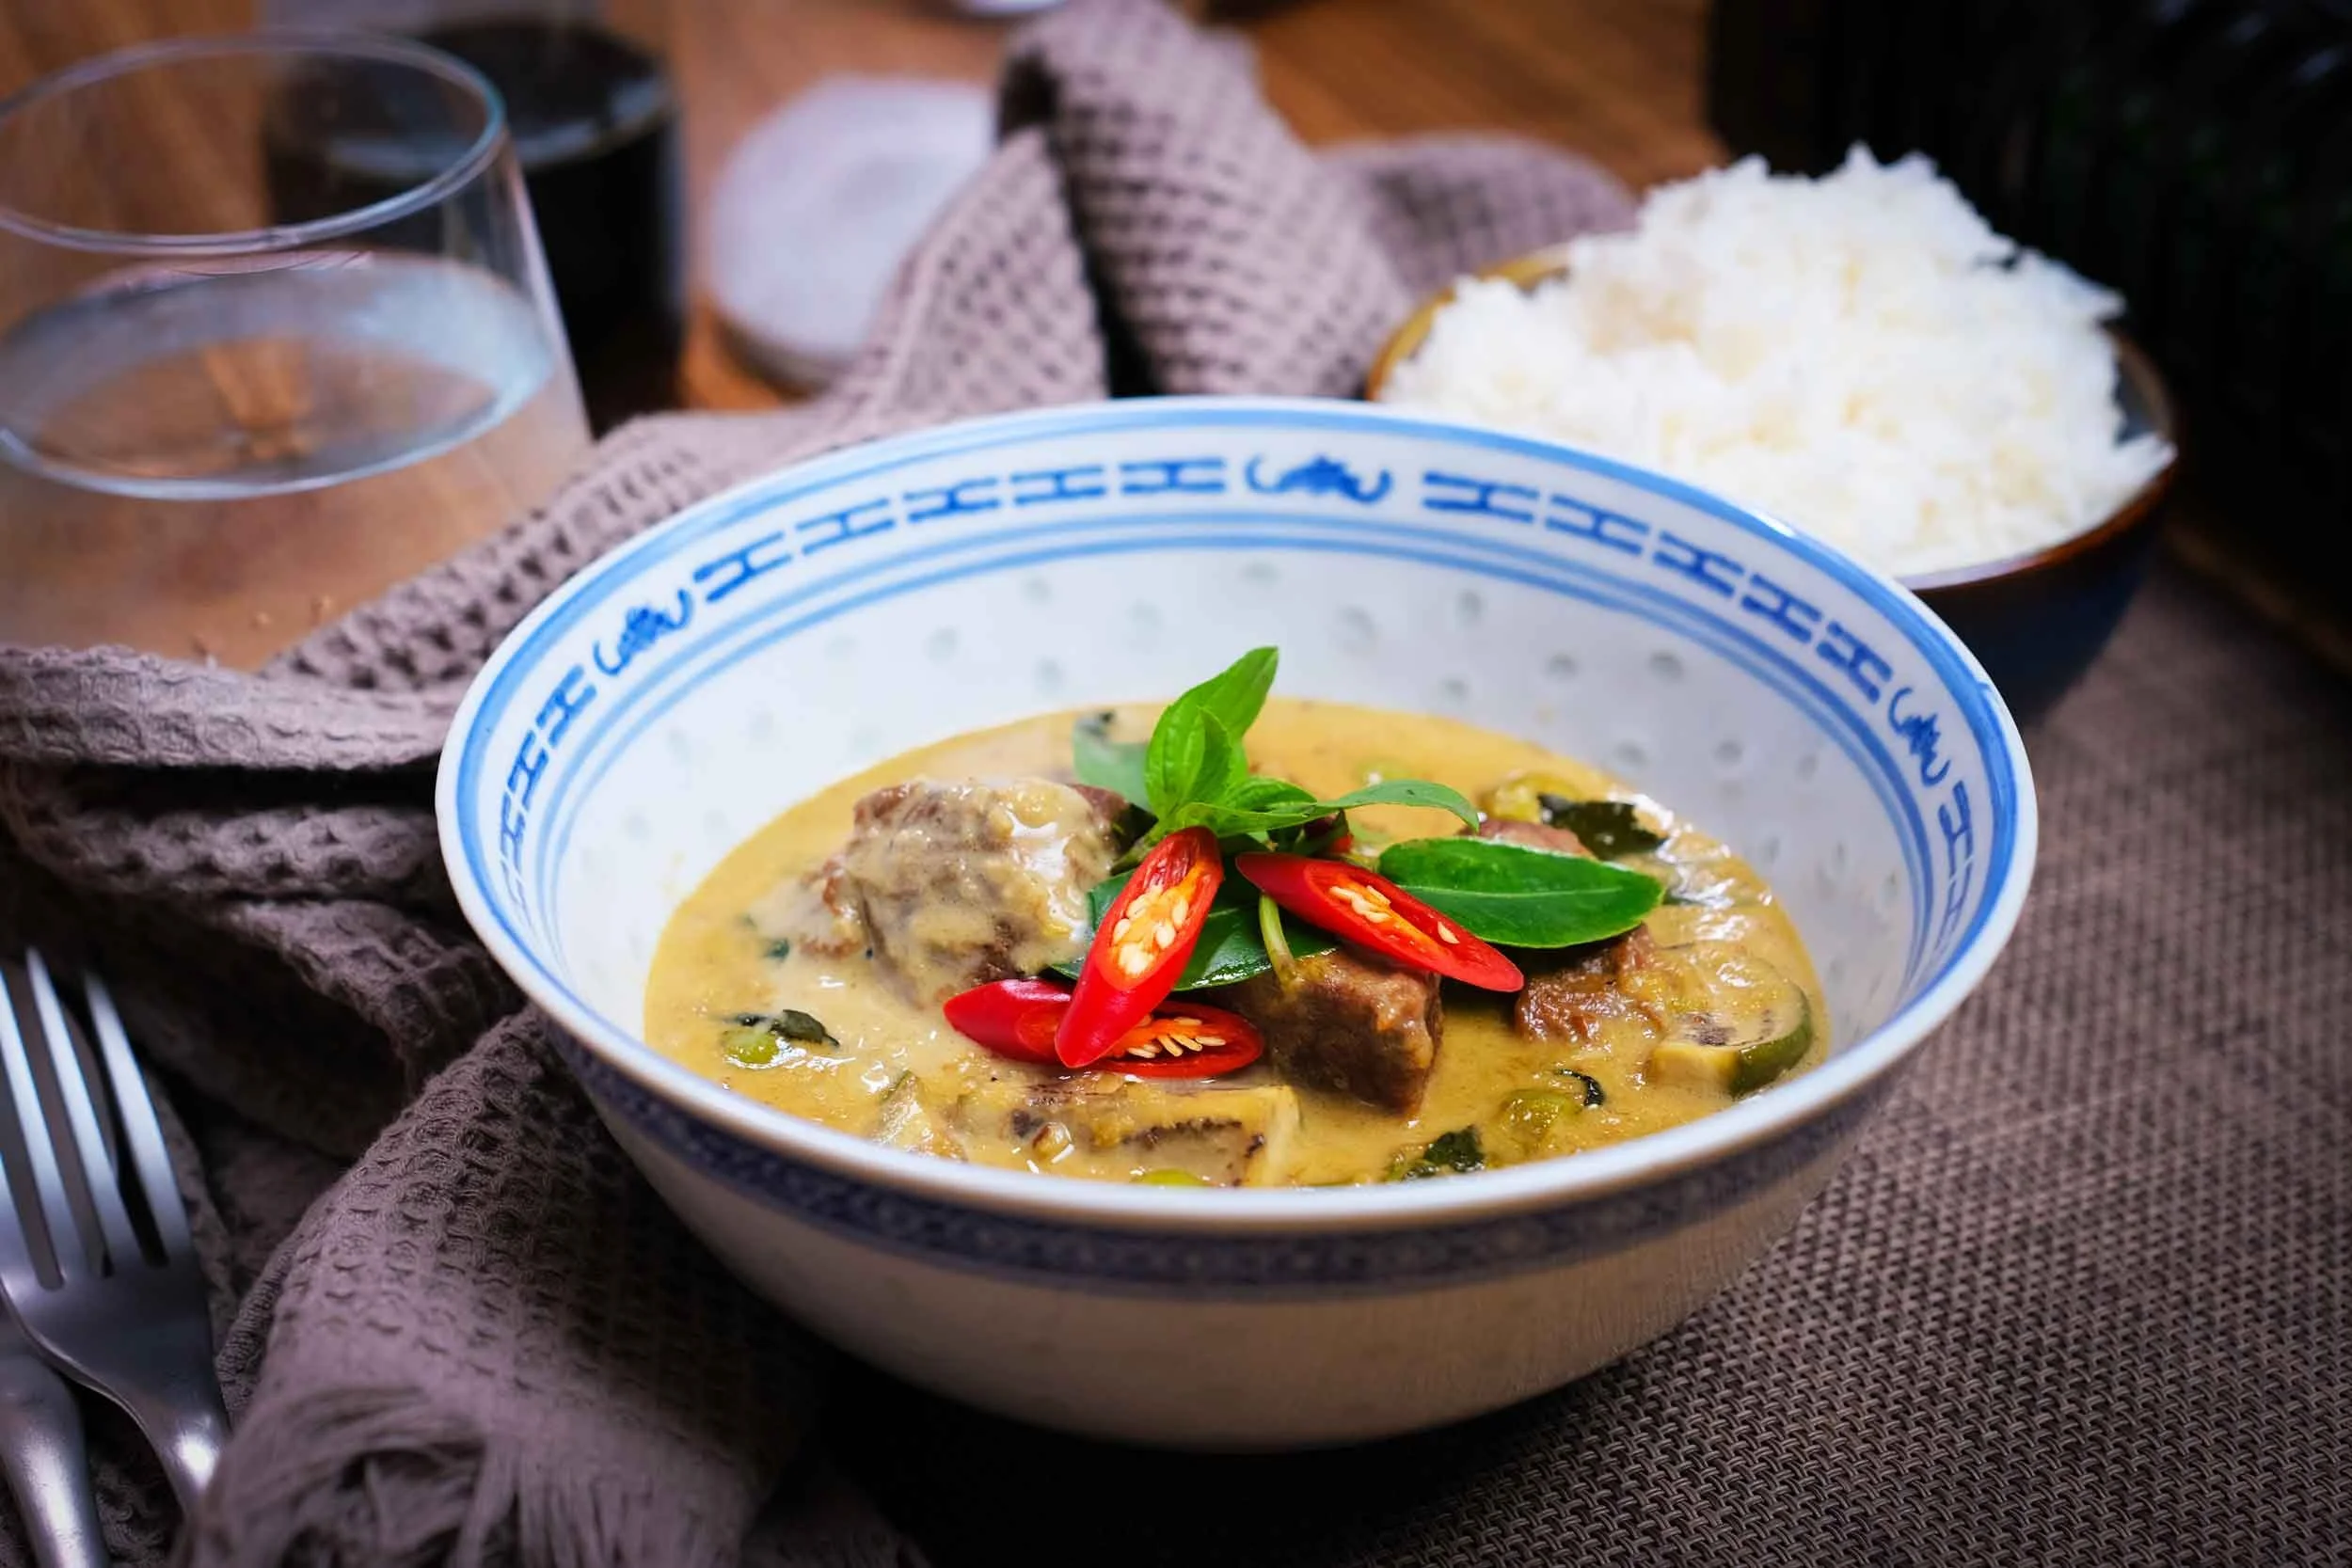
Authentic Thai Green Curry with Beef | แกงเขียวหวานเนื้อ

What sets this recipe apart is the insider tips and tricks that will help you take your cooking skills to the next level. From choosing the right ingredients to mastering the art of Thai curry, you'll learn all the secrets to creating the perfect Thai Green Curry with Beef.

Video tutorial

Thai Green Curry with Beef | แกงเขียวหวานเนื้อ

Master the Art of Thai Green Curry with Beef: Insider Tips and Tricks for Perfecting Your Recipe!

Preparation time: 20 minutes

Cooking Time: 15 minutes

Serves: 4

Ingredients:

- For the Curry:

- 1 kg beef (2.2 lbs)

- 1 cup sweet basil

- 6-7 kaffir lime leaves

- 1 1/2 tbsp palm sugar

- 1 1/2 tbsp fish sauce

- 1 liter coconut milk (34 fl oz) *(you can add 250 ml water if needed, e.g., if your coconut milk is too thick or you’d like to add more vegetables to the curry)*

- 500 ml water + 500 ml coconut milk for beef braising (17 fl oz + 17 fl oz)

- 180 g eggplant, cleaned (6.3 oz)

- 60 g pea eggplant, cleaned (2.1 oz)

- Optional: Additional vegetables like bamboo shoots

- Garnish: Finely sliced red chilies

- For the Paste:

- 1/2 cup chopped lemongrass

- 1/2 cup chopped Thai shallot

- 1/4 cup chopped garlic

- 1 1/2 tbsp chopped galangal

- 1 tbsp kaffir lime rind (from 1 whole fruit)

- 5 green spur chilies (peppers) or 80 grams (2.8 oz)

- 6 medium (2 inches long) green bird eye chilies

- 1-1 1/2 tbsp shrimp paste *(recommend 1 tbsp for store-bought shrimp paste)*

- 2 spice spoons roasted cumin seeds (before grinding)

- 2 spice spoons roasted coriander seeds (before grinding)

- 2 spice spoons white peppercorns (optional, if you’d like to lift the taste of spice)

- 2 coriander roots (optional, if you’d like to raise herbal aroma)

- Notes:

- No sea salt added in the paste as salt is used when braising the beef, and the fresh shrimp paste already has a good balance.

- Spice spoon is 1 ml of capacity

- Optional: 5-6 leaves of blanched sweet basil if you are not happy with the green color

Instructions:

1. Brown the Beef:

- Start by browning the beef in a pot with a little bit of oil. Add a few pinches of salt and continue cooking until all the liquid from the beef has disappeared and the beef has turned a nice brown color with a glaze.

2. Braise the Beef:

- Add 500 ml coconut milk and 500 ml water to the pot to braise the beef over medium heat. Turn the beef from time to time to ensure it does not burn at the bottom of the pot. Braise until the liquid has reduced to a glaze.

3. Prepare the Paste:

- Grind and pound the cumin seeds, coriander seeds, and white pepper.

- Chop the lemongrass, galangal, kaffir lime rind, Thai shallot, garlic, long green pepper, and coriander root (if using).

- Pound the hard ingredients first, such as galangal and lemongrass, then add the remaining ingredients.

- Once the mixture becomes a fine paste, add the ground spices and finish pounding with the shrimp paste. Set the paste aside.

4. Prepare the Vegetables:

- Cut the eggplants and soak them in saltwater to prevent oxidation.

- Pick out the tops of the pea eggplants and soak them in saltwater as well. Additional vegetables like bamboo shoots or coconut shoots can also be added.

5. Cook the Curry:

- Heat a little cooking oil in a pan over medium to low heat. Add the paste and fry it, adding a few tablespoons of coconut milk to add some more fat and liquid into the pan to prevent burning or sticking.

- Add palm sugar at this stage to help harmonize the taste and prevent bitterness. Stir fry until fragrant, about 3-5 minutes.

- Add the braised beef to the paste, ensuring to deglaze the pan with a little water and add it to the curry. Turn the beef in the paste to coat each piece.

- Gradually add coconut milk to the pan to keep the bottom from drying and burning. The green color should appear nicely separated.

- Add eggplants and pea eggplants, turning them to absorb the curry flavor for about 2-3 minutes, then add more coconut milk gradually until it covers the beef and veggies.

- Let it boil, add 1-2 tbsp fish sauce, stir, and taste. Adjust seasoning if needed, then top with sweet basil and torn kaffir lime leaves.

6. Serve:

- Rest the curry for about 5 minutes before serving.

- Garnish with some sliced red chili.

- Serve with steamed rice or fermented rice noodles.

Enjoy your delicious Thai Green Curry with Beef! 🥘🍚

Read More
BBQ and Grill Amy Raaf BBQ and Grill Amy Raaf

Thai BBQ Pork Recipe | Moo Ping

These delicious barbecued pork skewers can be found 24/7 in every corner of Thailand. If you love Thai street food - this recipe is a must on your cooking repertoire.

Moo Ping Recipe (serve 4-6)

1 kg (2 lbs) pork

1 cup coconut milk

5 roots of coriander

3 cloves garlic

1 tsp black pepper

1/2 tsp cinnamon (Optional. Can be discarded)

150 g (5 oz.) Palm sugar

3 tbsp light soy sauce

3 tbsp seasoning soy sauce

3 tbsp black sweet soy sauce

1 pinch of salt

Use 3/4 of the marinate sauce for the marinate, and keep 1/4 for brushing the pork while grilling.

Serve with a generous portion of fresh sticky rice!

Read More
BBQ and Grill Amy Raaf BBQ and Grill Amy Raaf

Thai BBQ Chicken Recipe | Gai Yang

This is my extremely easy and quick authentic Thai BBQ chicken recipe. Preparing the marinade takes just minutes! Give it a try.

Click image to view cooking tutorial video.

Gai Yang Recipe (Serve 3-4)

700-800g (1.6 lb) Chicken (whole leg)

2 tbsp Black Pepper

7 cloves Garlic

1 ½ tbsp Palm sugar

3 tbsp Seasoning Soy Sauce

1 tbsp Sea Salt

Read More
Dips and Sauces Amy Raaf Dips and Sauces Amy Raaf

Thai Chicken Rice Sauce Recipe | Khao Man Gai Sauce

Khao Man Gai is the Thai equivalent of the classic Hainanese Chicken rice. My quick and authentic recipe allows you to make this sauce in under two minutes once you have your mise en place ready.

Khao Mun Gai / Chicken Rice Sauce Recipe (serves 6-8)

180ml (6 fl oz) Soy Bean Sauce

6-7 tbsp of finely chopped ginger

1.5 tbsp of finely chopped fresh green and red chilies

1.5 tbsp of finely chopped garlic

4 tbsp of rice vinegar

5 tbsp of sugar

2 tbsp of Sweet soy sauce

Juice from 1 lime

Method: Clean and peel the Ginger and Garlic and run them individually in the food processor. Set aside.

Deseed the fresh chilies and run them in the food processor then add all the ingredients together in the food processor, mix and you’re ready to serve the sauce.

Read More
Dips and Sauces Amy Raaf Dips and Sauces Amy Raaf

Thai Crispy Pork & Rice Sauce Recipe | Nam Moo Krob Moo Daeng

Easy 2-minute Sauce Recipe for Thai Crispy Pork with Rice. This sauce goes equally well with crispy pork as it does with so called red pork with rice.

Nam Moo Krob Moo Daeng Recipe / Cripsy Red Pork with Rice Sauce (serves 4)

1/2 cup of Water

Chinese 5 spices powder

2 sticks of cinnamon

2-3 pcs Star Anis

Palm sugar

2 Coriander/ Cilantro root

1 pinch of salt

1 pinch of Black pepper

Read More
BBQ and Grill Amy Raaf BBQ and Grill Amy Raaf

Thai Red Chicken BBQ Recipe | Gai Yang Daeng

This Red chicken barbecue is a real Thai street food favorite! Enjoy my authentic recipe.

Gai Yang Daeng (serves 4-6)

1 kg (2 lbs) Chicken legs (de-boned)

1 cup Coconut milk

100 gr (3.5 oz) Palm sugar

12-15 Cloves of Western/Chinese garlic, or alt. 20-25 cloves of Thai garlic

5 tbsp Oyster sauce

5 tbsp Seasoning soy sauce

5 coriander roots

1 tbsp Black pepper (whole)

Red food coloring (Optional - This recipe is an authentic street food recipe which most often contain red food coloring. I personally have reservations, and cooking this at home I would not use the food coloring since it can be excluded without affecting the taste).

Read More
Fry Amy Raaf Fry Amy Raaf

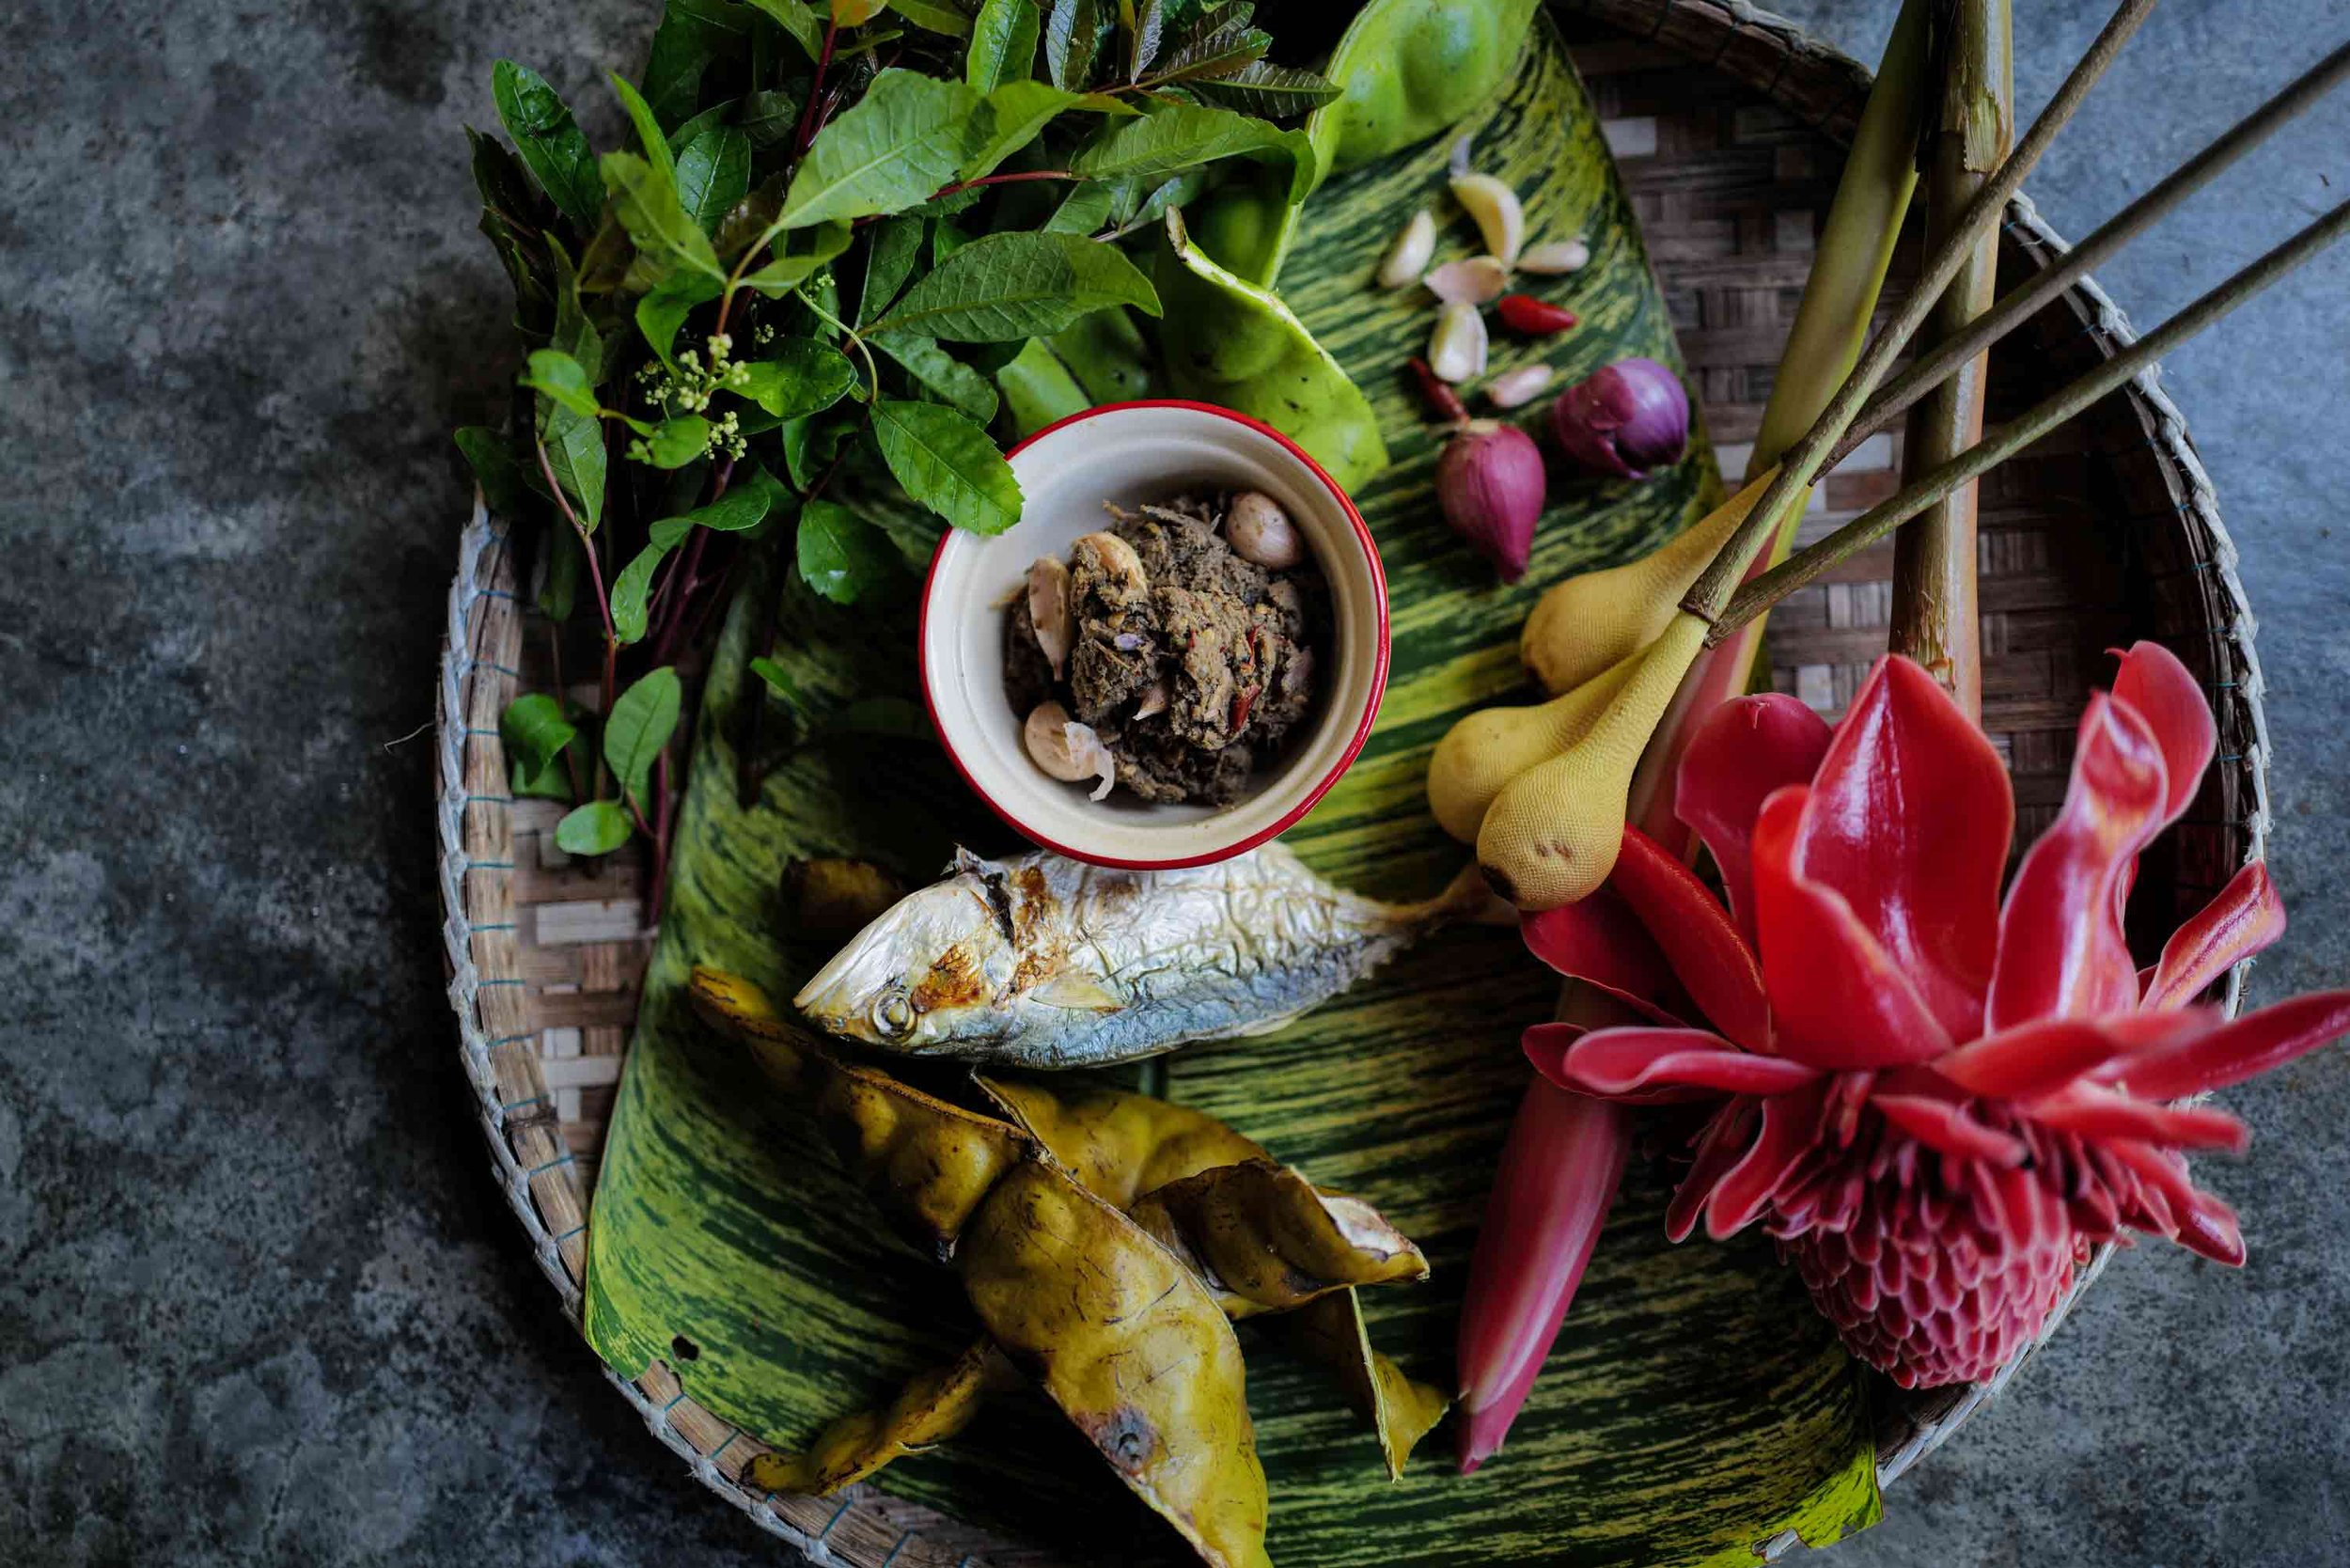
Thai Holy Basil Stir-fry | Pad Ka Prao

Indulge in the flavors of authentic Thai home cooking with this easy-to-follow recipe for "Pad Ka Prao Gai," passed down for generations in the family of World of Thai Food. Immerse yourself in the rich aromas and textures of Thai holy basil leaves, garlic, chili, and seasoned chicken, perfectly blended with oyster sauce, soy sauce, fish sauce, and palm sugar.

Cooking tutorial

Thai Holy Basil Chicken - Pad Ka Prao Gai | ผัดกะเพราไก่

Serves: 2

Ingredients:

- 300-400 g (10.6-14.1 oz) chicken (minced)

- 1 cup Thai holy basil leaves

- 15 cloves of Thai garlic (small)

- 5-7 bird's eye chilies (small)

- 3 tbsp oyster sauce

- 2 tbsp seasoning soy sauce

- 1/2 tbsp fish sauce

- 1 tbsp palm sugar or brown sugar

- 2 eggs (fried separately)

- 4 tbsp cooking oil

Instructions:

1. Prepare the Ingredients:

   - Mince the chicken or chop up chicken breast or thigh meat into small pieces.

   - Pick the Thai holy basil leaves from the stalks and set them aside.

   - Cut off the hard bottom of the Thai garlic but do not peel the paper off as it adds a great taste and texture when fried. If using Chinese or Western garlic, peel the garlic first.

   - Remove the stalks from the chilies. If using larger bird's eye chilies, cut them into smaller pieces.

2. Make the Garlic and Chili Paste:

   - Use a mortar and pestle to smash the garlic and chilies together until they become fragrant and fully blended.

3. Cook the Garlic and Chili Paste:

   - Heat the cooking oil in a pan over medium-low heat. Add the garlic and chili paste, frying it gently to prevent burning and bitterness.

4. Cook the Chicken:

   - Add the minced chicken to the pan. Fry until it is 70% cooked.

   - Add the oyster sauce, seasoning soy sauce, fish sauce, and palm sugar. If the mixture becomes too dry and sticks to the pan, add a little bit of chicken stock or water.

   - Stir-fry everything together until well combined. Taste and adjust the seasoning if necessary, then turn off the heat.

5. Add the Basil:

   - After turning off the heat, immediately add the holy basil leaves to the pan and stir quickly until all the leaves are coated in the sauce.

6. Fry the Eggs:

   - In a deep wok, heat plenty of oil. Once the oil is hot, crack the eggs into the oil.

   - Use a spoon to scoop the hot oil over the eggs until the whites are crispy and the yolks are medium-rare (lava-like).

7. Serve:

   - Serve the Pad Ka Prao Gai hot with steamed rice, topped with the fried eggs.

   - For added flavor, consider adding Prik Nam Pla (a Thai condiment) after breaking the egg yolk to elevate the taste.

Enjoy your Thai Holy Basil Chicken - Pad Ka Prao Gai! 🍛🥚🌿

Read More
Fry Amy Raaf Fry Amy Raaf

Pad Thai Recipe

My basic Pad Thai home recipe is 100% authentic and of course super delicious!

Pad Thai (or, stir-fried rice noodles) with Prawns Recipe

Preparation: 15 minutes (not including noodle soaking time)

Cooking time: 15-20 minutes

Serves: 3-4

Dried rice noodles 250 g

Fish sauce

3 tbsp Palm sugar

3 tbsp Lime juice

1 tbsp Tamarind puree

2 tbsp Cooking oil

3 tbsp Finely chopped shallot

2 tbsp Finely chopped garlic

1 tbsp Finely chopped sweet pickled radish*

2 tbsp Dried shrimp

½ cup Fresh firm tofu (50 g) cut into 1-cm cubes

Prawns 300 g peeled and deveined, tails intact

Hot water (for soaking the noodles and adding to the noodles while cooking)

Been sprouts 1 cup (plus ½ cup for serving)

Chinese chives 20 g cut into 1 ½ inches (option: spring onion)

Unsalted roasted peanut (30 g) crushed

2 Eggs

For garnish:

1- 1 ½ tbsp Dried Chili flakes

1- 1 ½ tbsp Lime wedges and Chinese chives, or spring onion, for garnish

1 tbsp White granulated sugar

Note: For a Vegetarian Pad Thai - simply leave out the dried shrimp and substitute prawns with additional tofu and more garnish

To serve: Add the Pad Thai to individual plates. Garnish with a wedge of lime, a stalk of chive and last but not least, 1-tsp white sugar and 1-tsp of dried chili flakes.

Lessons Learned:

Use a wide pan, or skillet. preferably with a nonstick surface.

Select a flat rice noodle about 5 mm wide.

Soak the noodles prior to making the pad thai - do not boil them or you may risk the noddles sticking together in one big lump.


How to make a Perfect Pad Thai from Scratch | Family Recipe #1


Pad Thai with Prawns


Pad Thai is one of the most famous and loved Thai Foods worldwide and there are many versions and recipes available online - some authentic, some not so much. Word of Thai Food only presents our family recipes that have been passed down through generations, and this Pad Thai is one of our all time family favorites. We believe that our take on the Pad Thai represents Thai home cooking at its best.


Pad Thai originates from the central part of Thailand, but this stir-fried noodle dish and other classic Thai cuisine can be found across the country from the North to the South with only minor local adjustments. World of Thai Food are based in Nakhon Si Thammarat Province in the south of Thailand, and here Pad Thai can be found along side typical southern dishes in night markets and on family dinner tables alike.


We often make this dish when we find cheap prawns in the fresh market, but it works just as well with the frozen shrimp or prawns that can be found in supermarkets across the world.


As you can see we only add water to help the frying process unlike many recipes that call for chicken stock. When combining these wonderful ingredients in the right sequence and temperature they will come together in the most authentic way possible, so there is no need to add any flavor enhancements from stock. Cook clean and save your wallet & your health.


For a Vegetarian Pad Thai - simply leave out the dried shrimp and substitute prawns with additional tofu and more garnish.


Pad Thai


Preparation: 15 minutes (not including noodle soaking time)

Cooking time: 15-20 minutes

Serves: 3-4


Dried rice noodles     250 g

Vegetable oil              

Fish sauce                  3 tbsp

Palm sugar                 3 tbsp

Lime juice                  1 tbsp

Tamarind puree        2 tbsp

Cooking oil                 3 tbsp

Finely chopped shallot                      2 tbsp

Finely chopped garlic                       1 tbsp

Finely chopped sweet pickled radish*        2 tbsp

Dried shrimp             ½  cup

Fresh firm tofu          50 g     cut into 1-cm cubes

Prawns                       300 g  peeled and deveined, tails intact

Hot water (for soaking the noodles and adding to the noodles while cooking)

Been sprouts              1 cup (plus ½ cup for serving)

Chinese chives           20 g     cut into 1 ½ inches (option: spring onion)

Unsalted roasted peanut      30 g     crushed

Egg                              2

Dried Chili flakes       1- 1 ½ tbsp.

Lime wedges and Chinese chives, or spring onion, for garnish

White granulated sugar        1 tbsp


*          A constant challenge when cooking Thai food in Europe, the US and other parts of the world is finding some of the key ingredients. In this recipe that challenge would be the “sweet pickled radish”, which is actually a turnip that also goes by the names “preserved radish”, or “pickled turnip”. Confusing, yes indeed.

Start by soaking the noodles in a bowl of warm water for 5-10 minutes or as per cooking instructions on the package. Drain and set aside when the noodles are soft.

While soaking the noodles, proceed to make the original Pad Thai sauce by mixing fish sauce, lime juice, palm sugar and the tamarind puree in a bowl. Set aside.

Heat up a wok or large frying pan over medium heat. Start by adding the cooking oil in the hot pan, immediately followed by garlic, shallots and sweet fermented radish. Sauté for 1-minute and you will smell the fragrance of the garlic and onions.

Then add the dried shrimp and stir for 1-minute before adding the tofu. Give the tofu about 1-minute and remember to make a little bit of room in the pan for it to get slightly seared.  Next, add the prawns and sauté for 2-3 minutes until the prawns turn reddish pink. Make room for the noodles by pushing the contents of the pan to one side.

Put the noodles in a strainer and shake off excess water before adding it in the wok. Stir fry for 1-minute in the same pan as the above ingredients but do not mix it with the other ingredients yet. If the noodles stick to the pan you can add a tablespoon of warm water. Add the Pad Thai sauce and stir-fry the noodles and sauce for 2 minutes or until the noodles are cooked and the sauce has dried up slightly. Remember to occasionally turn over the other ingredients in the pan to make sure they do not burn. When the noodles are ready mix everything together in the pan, then again, push all the contents of the pan to one side to make room for frying the eggs.

Lower the heat. Make sure you have pushed the ingredients to the side of the pan before cracking 2 eggs into the empty part of the pan. Do not (!) add the eggs to the noodles at this stage. Pull, lift and fold the eggs until thickened and only a little liquid egg remains before mixing them with the rest of the ingredients in the pan. Stir well.

In the final step, add beansprouts, chives (or spring onions), ground peanuts and dried chili flakes. Stir and turn it well.

To serve: Add the Pad Thai to individual plates. Garnish with a wedge of lime, a stalk of chive and last but not least, 1-tsp white sugar and 1-tsp of dried chili flakes.

Read More
Fry Amy Raaf Fry Amy Raaf

Moo Grob | Thai Crispy Pork

Forget the complicated and long processes other Thai chefs on YouTube promote. My unique recipe will give you perfect crunchy crispy pork at a fraction of the time! No mess, no sun drying, no deep-frying just put in any conventional oven and enjoy!

Amy's Crispy Pork recipe (4 persons)

Ingredients:

1 kg (2 lbs) Pork belly

Sea Salt

Rice vinegar (Enough to soak the skin side of your pork belly)

1) Score the pork belly and place it in an oven tray.

2) Cover the pork belly in salt on all sides and make sure to work the salt into the scores. Leave in room temperature for one hour.

3) Flip the pork so it is now skin side down on the tray. Add rice vinegar until it has covered the skin layer (approximately 5-10mm). Rest in vinegar skin side down for 20-30 minutes in room temperature.

4) Pour the vinegar from the tray. Flip the pork so it is skin side up then place the oven tray in a pre-heated oven (150 degrees C or 300 degrees Fahrenheit) for 1 hour.

5) Take out the pork belly and let it rest in the oven tray until it has cooled down to room temperature.

6) Put the pork belly back in the oven (which should now be pre-heated to 225 degrees C or 435 degrees Fahrenheit at this point). Leave in oven for 30-45 minutes until the skin and sides are golden brown. Make sure the core temperature reaches a minimum of 75 degrees C or 160 degrees Fahrenheit.

7) Let the pork belly rest for 10 minutes before cutting it.

Amy's easy dipping sauce recipe (This sauce will taste even better if you make it the day before and leave over night before eating it)

1 red spur chilies

1/2 cup Black sweet soy sauce

Read More
Dips and Sauces Anders Raaf Dips and Sauces Anders Raaf

Thai Mango dip sauce | Nampla Whan

Thai Mango dip sauce - Nampla Whan Recipe (serves 4)

If you don't have access to young mango don't despair, this dip works perfectly with anything sour like an unripe pineapple, green apple, pomelo, etc.

Ingredients:

2 unripe young/sour Mango's (Be careful when you cut them into slices. Cut diagonally to avoid the hard center of the fruit - then angle the blade of the knife to break the slices off from the center)

4 Tbsp Fish sauce

3 Tbsp Palm sugar

1/4-1/2 Cup of Water

1/2 Tbsp Shrimp paste (optional - but adds authenticity)

1 Cup Dried shrimp (smash 1/2 cup using a pestle and mortar. The rest of the whole dried shrimp you add in the sauce)

3 pcs small Shallots

3-4 whole dried chilies

2 Bird's eye chilies or any hot chili you have available

Read More